Blog

  • Are Lash Extensions Bad for Your Natural Lashes?

    Are Lash Extensions Bad for Your Natural Lashes?

    No. Lash extensions are safe for your natural lashes when they are done correctly. If your lash artist works carefully and you look after your set, you can wear them for years without a break.

    Damage does happen. But it comes from a short list of mistakes, and many of them are on the lash artist’s side. Once you know what they are, you can spot them yourself. The quickest one to check is time. A proper classic full set takes me about two hours, so I would book with somebody else if a lash artist says they can do one in an hour.

    The Main Cause of Damage: One Extension on Several Lashes

    Every extension should sit on one natural lash. Lash artists call this isolation. We separate a single natural lash from the ones around it, then glue the extension to that lash only.

    Isolation matters because each of your lashes grows at its own pace. One lash next to another can be at a different stage. One is mature and will fall out soon. Its neighbour is only halfway grown.

    When one extension is glued to two or three of those lashes, the lash that is growing faster pushes the extension out and pulls on the others. Over time that tugging pulls lashes out before they are ready to shed.

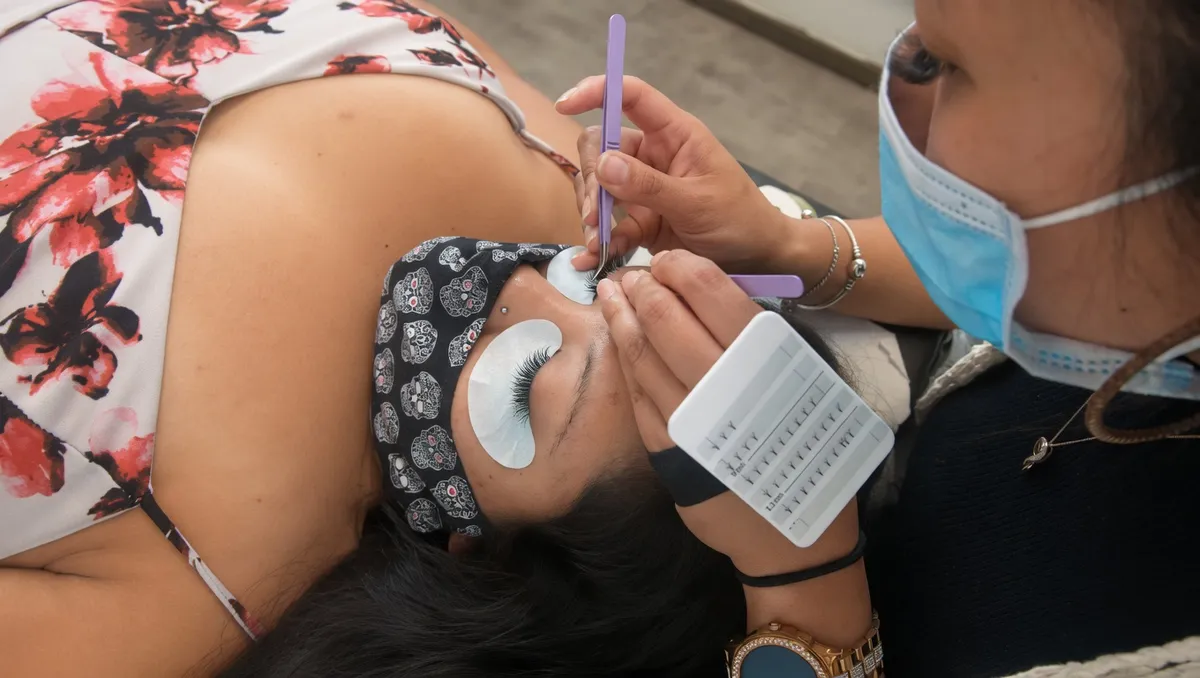
    Lash artist using two tweezers to isolate a single natural lash, with finished extensions taped back
    Isolating one natural lash. Taping the finished extensions back makes the bare lashes easier to see.

    How Much Shedding Is Normal

    Your natural lashes shed all the time, with or without extensions. Most people lose three or more natural lashes a day. Over two weeks that adds up to forty or more, and some of them were carrying extensions.

    A new lash grows in behind each one that falls out. That new growth is what your lash artist works on at your fill. So a set that thins out a little each day is normal. What is not normal is losing natural lashes before they are ready. You can see how a fill works on the new growth.

    How to Check Your Own Lashes

    You can check this at home. When an extension falls out with your natural lash, look at it closely. You should see one natural lash attached. If you see two or more stuck together, the set was not isolated properly.

    Extensions that are applied properly feel natural. It should not feel like you have anything on your eyes. Pain is a warning sign:

    • Tugging or pulling usually means an extension is glued to more than one natural lash.
    • Poking usually means an extension was placed on the skin of the eyelid instead of on the lash.

    If you feel any discomfort, contact your lash artist right away.

    Extensions That Are Too Long or Too Heavy

    An extension can be up to 3 millimetres longer than the natural lash it sits on. That is the rule I follow when clients ask if they can go a little longer. Anything longer can be too heavy for that lash. A lash carrying too much weight can shed early, and over time it can be damaged.

    You can check the length yourself. Take an extension and hold it right beside one of your natural lashes. Eyeball whether it is more than 3 millimetres longer. Fuller styles add more to each lash, so check how classic, hybrid and volume sets differ before you book.

    Skipping the Cleaning

    Clean your lashes every day, starting 24 hours after your appointment. Some damage happens at home when this gets skipped. Use a lash shampoo, a cleanser or baby shampoo. I send my clients home with the [affiliate id=”lash-shampoo-stacy”]Stacy Lash shampoo and brush set[/affiliate]. The set comes with its own brush.

    When lashes are not cleaned, build-up collects at the base and the lash line gets unhygienic. That build-up can irritate your eyes. Lash mites are attracted to the dead skin that collects there, and they feed on it. Mites can clog the follicles your lashes grow from. That affects your natural lashes, and over time it can leave thin or bald spots. Cleaning every day also helps your set stay on. More on that in how long lash extensions last.

    [product id=”lash-shampoo-stacy”]

    How to Choose a Lash Artist Who Takes Their Time

    Good isolation takes time. A lash artist who rushes is the one most likely to glue extensions to several lashes. So before you book, ask two questions:

    • How long have you been lashing?
    • How long does a full set take you?

    A volume full set takes me about three hours. If you have had a volume or mega volume fill done in 45 minutes, look closely at your lashes when they shed.

    Read reviews, and ask all the questions you have. A good lash artist is happy to explain how they work. Part of that time goes into setup, like placing eye pads and tape so each natural lash is easy to see.

    Close-up of a finished set of lash extensions on a client's closed eye, with an under-eye pad in place
    A finished set. Each extension sits on its own natural lash.

    When the Adhesive Is the Problem

    Some people react to lash adhesive. I have had clients react. When that happens, I switch them to [affiliate id=”lash-glue-sensitive-stacy”]Stacy Lash Sensitive glue[/affiliate].

    Sensitive glue dries more slowly than a regular adhesive, so the set takes longer. I decide on it client by client. Even with sensitive glue, some clients still react. If that happens, lash extensions are not for you, even when they are applied well.

    If Your Lashes Are Already Damaged

    Sometimes a new client comes to me with lashes another artist has damaged. I suggest a full removal of the extensions. Depending on how bad the previous set was, clumps of natural lashes can come out with them. Then the client takes a break for at least a month before their next full set.

    Use a lash serum during the break. The one I recommend is GrandeLASH-MD. It is popular, and in my experience it works well for encouraging growth.
  • How Long Do Lash Extensions Last? A Lash Artist Explains

    How Long Do Lash Extensions Last? A Lash Artist Explains

    Lash extensions last about two to four weeks before you need a fill. That is the short answer, and it is the one I give clients at the end of every first appointment.

    The longer answer is that each extension lasts exactly as long as the natural lash it is glued to. Your set does not fall off all at once. It thins out a few lashes at a time. How fast depends mostly on the time of year and what you put on your face.

    Why Extensions Fall Out: Your Natural Lashes Shed

    An extension is bonded to one natural lash. When that natural lash sheds, the extension goes with it. This is normal, and it does not damage your lashes. Damage comes from how a set is applied. Here is when lash extensions are bad for your natural lashes.

    Every natural lash grows for a while, rests and then falls out to make room for a new one. Because your lashes are all at different points in that cycle, a few of them are ready to go on any given day. Most people lose three or more natural lashes a day.

    Three a day does not sound like much. Over two weeks it adds up to around forty lashes, and some of those were carrying extensions. That is why a set that looked full on day one looks patchy by week three.

    The new lashes growing in are the ones I use at your fill. Old extensions on grown-out lashes come off, and fresh extensions go on the new growth. If you want to see that from the lash artist’s side, here is how a lash extension fill is done.

    Why Lashes Shed Faster in Fall and Spring

    I first noticed this when several clients told me in the same fall that their sets were not lasting as long. It was the season.

    When the temperature and humidity change, the growth cycle shifts with them. You shed more hair on your head, and you shed more lashes too. Your skin also makes more oil during the change to keep itself from drying out. Oil breaks down lash adhesive, so the extensions that stay on have a harder time holding.

    I told each of them to wash their lashes every day with lash shampoo. Shedding still happens. Daily washing keeps the extra oil from loosening the extensions that are left.

    The Mistake I See Most: Oil Near the Lash Line

    When a client’s extensions come off early, my first question is about their skincare. The most common cause I see is a face cream or moisturizer with oil in it, used close to the lash line. Clients do not think of it as a lash product. So it does not come up until I ask.

    Oil softens the bond. A little every morning and every night adds up fast. Check the labels on your cleanser, moisturizer, eye cream and makeup remover. If a product you love has oil in it, you do not have to give it up. Keep it on the rest of your face and stay clear of the eye area.

    A few other things cause early loss too:

    • Water in the first 24 hours, while the adhesive is still curing.
    • Rubbing your eyes. Whatever is on your fingers ends up on the bond.
    • Makeup left at the base of the lashes.
    • Sleeping face down.

    Why I Am Picky About Adhesive

    Some early loss comes from the lash artist’s side, not yours. When I started lashing, I had sets come off in the first week. The cause was the adhesive. I tried several glues over the years that were not the same standard. Some bottles held well and the next bottle of the same glue did not. Retention was shorter across the board.

    When a set fails like that, the client loses their time coming back to have it redone. The lash artist loses some of their reputation. That is why I only use an adhesive I can rely on.

    Now I use [affiliate id=”lash-glue-lightning-stacy”]Stacy Lash Lightning glue[/affiliate] on my clients. It sets fast. It has also been consistent for me in a way the older glues were not. If you are choosing a lash artist, it is fair to ask what adhesive they use. Each extension should also sit on one natural lash, never glued to its neighbours. Careful taping and setup at the start of the appointment is part of how a good artist gets that right.

    How to Make Your Lash Extensions Last Longer

    Keep them dry for the first 24 hours. That includes steam and sweat. The adhesive needs that time to cure.

    Wash them every day after that, ideally in the morning. I recommend [affiliate id=”lash-shampoo-stacy”]Stacy Lash shampoo[/affiliate]. Washing clears off the oil that would otherwise sit on the bond. Morning is the best time because sleep crust and oil from your skin collect along the lash line overnight. If you do not have lash shampoo on hand, use a soap that is oil free and gentle on extensions.

    Keep oil away from your eyes and your hands off your lashes. If they feel tangled, brush them from the middle to the tips with a clean spoolie instead of rubbing.

    [products_widget]

    When to Book a Fill

    Book your fill within three weeks. That is the rule I give every client. At three weeks there is still enough of the set left that a fill brings it back to full. Fuller sets show gaps a little sooner than light ones. If you are not sure which style suits your natural lashes, here is how classic, hybrid and volume sets compare.

    Sometimes a client comes in much later with very few extensions left. I do not turn them away. I explain that I will add as much as I can in the time we have booked. If they want the set fuller than that, we book another appointment to finish it.

  • Lash Taping Techniques: How to Place Eye Pads and Tape

    Lash Taping Techniques: How to Place Eye Pads and Tape

    Taping is the part of a lash set nobody sees. It is also the part that decides how fast the rest of the appointment goes. Good placement gives you a clean view of the lash line and keeps the bottom lashes out of the way. Bad placement traps lashes, irritates the eye, and hides the inner corner right where you need to see it most.

    Here are the taping techniques I use every day, including the ones I fall back on when a client’s eyes will not stay still.

    What Taping Is Actually For

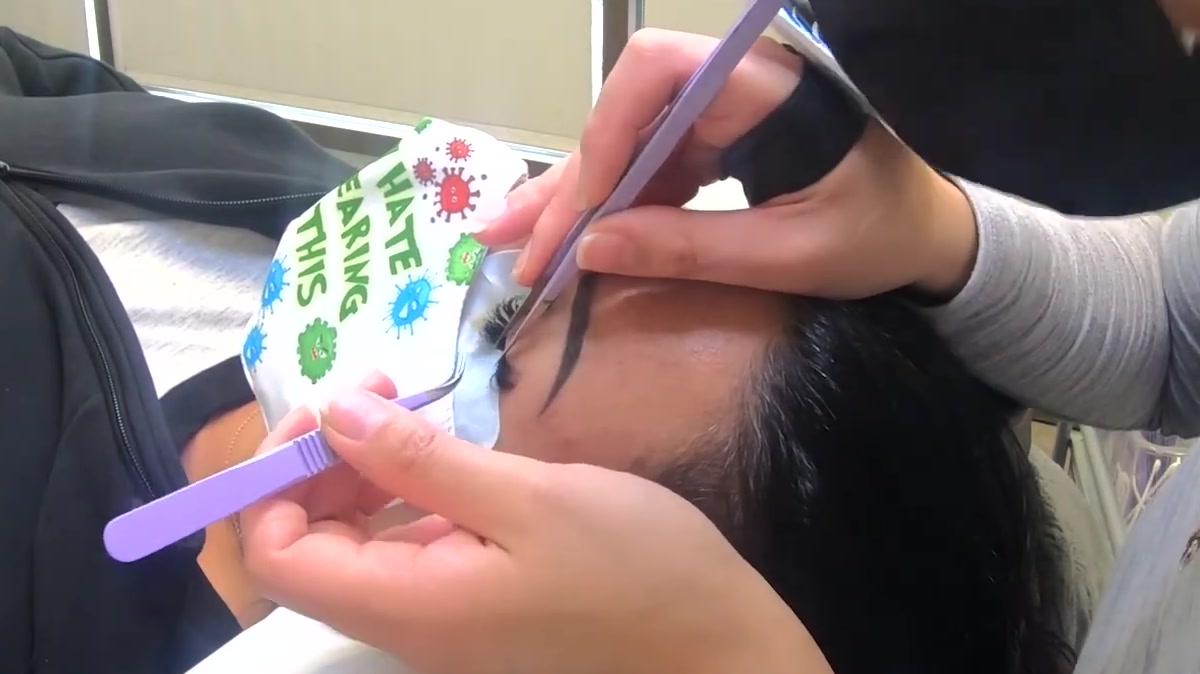
    Taping does three jobs at once. It holds the bottom lashes down so they cannot stick to the adhesive. It gives you a pale background so you can see each natural lash. It also protects the lower lid through a two hour appointment.

    You have two tools to work with. Under eye gel pads cover a lot of ground and feel cool and comfortable. Tape is thinner and more precise, so it gets into places a pad cannot. Most of your lashing sets will use both.

    The Standard Eye Pad Placement

    Start here. This is the placement that works for most clients.

    Ask your client to look up. That pulls the lower lid down and opens up the space you are working with. Place one corner of the [affiliate id=”eye-patches”]eye pad[/affiliate] down first. Then walk it across to the other corner, pressing gently as you go.

    Leave a small gap at the waterline. Around half a millimetre to a millimetre is the standard, and it matters a lot. Any closer and the pad can sit against the eye or press on the oil glands along the lid margin. Any further out and you start leaving lower lashes uncovered.

    Every lower lash needs to be under the pad. A single one left loose will find your adhesive during the set, and you will not notice until the client opens their eyes and the lid will not separate.

    Do not try to lay the whole pad down in one motion. It will shift. It will land crooked. You will be peeling it back off. Start with one corner, then work it across.

    Two Checks Before You Start Lashing

    Once the pad is on, stop and check two things. Both take only a few seconds and both save you a lot of trouble later.

    Check for trapped lashes. Natural upper lashes get caught underneath the pad all the time. Lift the edge of the pad and look. If a lash is stuck under there, use your [affiliate id=”lash-tweezer-set”]tweezers[/affiliate] to bring it out before you go any further. A lash you miss now is a lash you skip in the set.

    Ask if the pad feels okay. This one matters more than lash artists think. A pad can sit perfectly while the eye is open, then shift the moment your client closes it. If it moves up onto the eye, it will irritate your client for the whole appointment.

    If they say it is touching, have them keep their eyes closed and adjust it from there. Do not make them open up again. You want to fix it in the position they will actually be lying in.

    [products_widget]

    The Closed Eye Method for Twitchy Eyes

    Some clients cannot hold their eyes open without fluttering. Asking them to look up just makes it worse. For those clients, skip the open eye step completely.

    Have them close their eyes and keep them closed the whole time. Gently lift the upper eyelid. Place one corner of the pad or tape down, then work across to the other corner the same way you would normally.

    You get the same placement without asking anything of the client. This is the technique I use with nervous first timers.

    Add Tape Over the Bottom Lashes

    Sometimes the pad alone is not enough. Bottom lashes that are long or curl upward will still reach past the edge of the pad and find your adhesive.

    Have the client look up. Slide the pad in just underneath the bottom lashes. Then lay a strip of tape over the top of the lower lashes to pin them down flat.

    Tape choice matters here. Use a sensitive tape that is latex free, breathable, and made for skin. The adhesive strength is what causes most tape reactions, not the tape itself, so a gentler tape removes a problem before it starts.

    One tip before the tape goes near a face. If your tape is very sticky, press it onto the back of your hand once first. That lifts some of the adhesive off and makes removal far gentler at the end of the appointment. Your client will notice the difference.

    The Two Tape Method, No Pad

    Not everyone likes working with pads. If you prefer tape, you can do the whole thing with two strips.

    Have your client look up. Take the first strip and lay it down starting at one corner. Take the second strip and do the other corner. Between them they cover the lower lash line.

    There is a variation worth knowing. Instead of two strips meeting in the middle, cross them. One strip runs from the inner corner outward, the other from the outer corner inward, and they overlap in an X. The cross holds the pad and the bottom lashes together in one move, which is useful on clients whose pads keep drifting.

    There is one catch. Some tape is too clear. You end up with almost no contrast between the tape and the natural lashes, and isolating gets harder than it needs to be.

    The fix is simple. Lay an eye pad on top of the tape. The pad gives you a solid pale background to work against, and the tape underneath is still doing the holding.

    Lift the Lashes Off the Pad

    Here is a problem that shows up on fills. The bottom lashes are already taped down, and the natural lashes are sitting too close to the tape or the pad. Every time you go in with tweezers you are fighting the edge.

    Take a strip of tape and place it at the base of the lashes. Then lift it slightly and anchor it at both corners. That small lift pulls the lash line up and away so nothing is resting on the pad.

    You are not trying to stretch the eye open. A little lift is enough.

    Tape for the Inner Corners

    Inner corners are the hardest part of any set. The lashes are shorter, finer, and they sit at an angle that is awkward to reach.

    Place a small piece of tape right in the inner corner. Then lift it diagonally, up and outward. That angle brings the inner corner lashes out where you can actually isolate them.

    Once you get used to this one you will use it on almost every client. Inner corners are usually where retention quietly fails, because they are the lashes people rush.

    If the Eye Is Red Afterwards

    Redness after a set gets blamed on the adhesive almost every time. Taping causes a fair share of it, and the two look different once you know what to check.

    A sharp, straight line of redness points at the pad or the tape. That line is the edge of something that moved and rubbed during the appointment. It usually sits low on the eye, right where the pad was.

    Adhesive irritation looks different. The white of the eye goes red rather than marked with a line, and the client can describe stinging rather than soreness. A true allergy shows up on the outside instead, with swollen lids, itching, and skin that stays irritated after the appointment ends.

    This is worth getting right. A client who thinks they are allergic to lash adhesive will stop getting lashes done. If the cause was a pad that slipped, the fix is placement, not giving up extensions.

    Which Technique to Reach For

    You do not need all of these on every client. Start with the standard pad placement and add a technique when something is not working.

    • Standard pad placement — your default for most clients
    • Closed eye method — twitchy eyes, nervous clients, first timers
    • Tape over the bottom lashes — long or upward curling lower lashes
    • Two tape method — when you prefer tape, add a pad on top for contrast
    • Criss-cross — pads that keep drifting mid-set
    • Base tape lift — fills, or when lashes rest on the pad
    • Inner corner tape — any time the inner corners are hard to reach

    Taping is worth practicing on its own. Spend a few sets getting it right and everything after it gets faster.

  • Lash Extension Styles Explained: Classic, Hybrid, Volume and Mega Volume

    Lash Extension Styles Explained: Classic, Hybrid, Volume and Mega Volume

    Not all lash sets are the same. The style you pick changes the final look, the time in the chair, and how often you come back. Classic, hybrid, volume, mega volume: each one suits a different client and a different goal. Here’s what separates them.

    Classic Lash Extensions

    A classic set is the foundation. One extension goes on one natural lash, across the full eye. That 1:1 ratio keeps the result clean and wearable. You’re enhancing what’s already there, not stacking on top of it.

    Classic works best for clients who already have good natural coverage. They want lashes that read as “just great lashes,” not “clearly wearing extensions.” It’s also the lowest-maintenance style of the four. With one extension per lash, growth and shedding are easy to track, so fills go quickly.

    For a first appointment, classic is often the right start. You can go fuller at the next fill once you see how the natural lashes hold up.

    Hybrid Lash Extensions

    Hybrid splits the eye roughly 50/50 between classic extensions and small volume fans, usually 2D or 3D. The fans are spread through the set. They add texture and depth without going fully dramatic.

    The result has some fullness and dimension but still looks natural day to day. It suits clients who tried classic and wanted a bit more. It also suits clients who like the idea of volume but worry it’s too much for work.

    Hybrid helps with uneven natural lashes, too. The mix of classics and fans fills in sparse areas without making the whole set feel heavy.

    Volume Lash Extensions

    A volume set puts a fan of two to five extensions on each natural lash. These are called 2D through 5D. The lashes in each fan are finer, so a whole fan weighs about the same as one classic extension. Weight matters. An extension that is too heavy for its natural lash can make it shed early. More on that in are lash extensions bad for your natural lashes.

    Done well, a volume set looks full, fluffy and dark along the lash line. It doesn’t feel heavy or stiff. It’s the most popular style for a reason. It photographs well, holds up between fills, and makes mascara feel pointless.

    Volume takes more skill and more chair time than classic. The tech has to make each fan or pick good pre-mades. Placement matters more with several extensions on one lash. [affiliate id=”lashes-individual-volume”]Pre-made volume fans[/affiliate] speed up fills a lot and keep the spread even across the set.

    [products_widget]

    Mega Volume Lash Extensions

    Mega volume starts at six extensions per natural lash and goes up from there: 6D, 10D, even higher. The lashes are ultra-fine, typically 0.03mm to 0.05mm, to keep the weight down. The fans are wrapped tight so they hold their shape.

    This is the darkest, fullest look there is. The lash line turns almost solid black. It’s dramatic on purpose. You see it in editorial work and on clients who want maximum impact every day.

    Mega volume is the hardest style to apply and the slowest to fill. Not every tech offers it. Not every natural lash can safely carry that many extensions. A proper consultation matters more here than with any other style.

    Which Style Is Right for You

    There’s no single right answer. It comes down to four things: your natural lashes, your lifestyle, how much upkeep you want, and the look you’re after.

    Bring reference photos to your first appointment. Tell your tech what a normal day looks like for you. A style that looks great in photos might not suit a conservative workplace. It might not suit a schedule that can’t fit a fill every three weeks either.

    Still unsure? Start with classic or hybrid. Going fuller at your next fill is easy. Wishing you’d gone lighter is not.

  • How to Do a Lash Extension Fill

    How to Do a Lash Extension Fill

    A lash extension fill sounds simple. Then you skip a step and see how much can go wrong. I’ve done fills for years and I still run the same checklist every time. I don’t have to. But the few times I rushed it, I paid for it in retention.

    Start With a Proper Cleanse

    Before touching a single extension, I cleanse. Every time, no exceptions.

    I use a microfiber brush with contact solution and primer to clear off makeup, oil and residue. This is the step people skip when they’re running behind. It’s also behind half of all retention complaints. Extensions need a clean surface to bond to. If anything sits between the adhesive and the natural lash, you lose retention before you start.

    If a client comes in with heavier makeup, I swap to a proper lash cleanser and work it through with the brush. It takes an extra minute. It’s worth it every time.

    Remove the Grown-Out Extensions

    Once the lashes are clean, I remove any extension that has grown out more than a millimeter from the lash line.

    My rule: if an extension sits two to three millimeters from the skin, it comes off. I use the banana peel technique to slide it off cleanly. Then I place a fresh extension on that natural lash at the right distance.

    This is about comfort. An extension that has grown too far down the lash can pull and twist. That irritates the eye, most of all when a client sleeps or rubs their eyes. Pulling is also the first sign of an extension glued to more than one natural lash, which is what damages natural lashes.

    It adds a few minutes to the appointment. It’s also the difference between a fill that looks fresh and one that only looks full.

    Placing the New Extensions

    The fill itself is easy once the cleanup is done. I work through every lash that has grown out or lost its extension. Each new one sits one millimeter from the skin, no closer.

    That gap isn’t optional. Too close and you get irritation and contact with the eyelid. Retention drops too, because the glue joint is under constant pressure. I keep the same gap across the whole set so it looks and feels even.

    Why I Use Pre-Made Fans for Fills

    For this fill I’m using pre-made volume fans. I’ve come to like them for fills in particular.

    Every pre-made fan comes out the same shape with the same spread. That gives the finished set an even, fluffy look, and I don’t spend extra time making fans at the tray. For a full set I still prefer making my own. For a fill I want to move fast and match the lashes already there. Pre-mades do that well. I use [affiliate id=”lashes-individual-volume”]pre-made volume fans[/affiliate] when I need a consistent shape and faster placement.

    [products_widget]

    Sealing the Set Without Collapsing the Fans

    When the lashes are done, I finish with a sealant. How I apply it took me a while to figure out.

    The mistake I used to make: putting sealant on a regular brush and coating the full extension. That collapses the fans. They go from fluffy to spiky in about ten seconds and there’s no coming back from it.

    What works: load a thin microfiber brush lightly with sealant. Apply it only to the base of each extension and keep it off the fans. Use just enough to seal the bond. The fans stay open, the set stays fluffy, and the sealant still does its job.

    That’s the full process. Cleanse, remove grown-outs, fill, seal. Each step sets up the next one. Skip the cleanse and retention suffers. Skip the grown-outs and the set looks uneven. Do all four and a fill looks as good as a full set.